We had a major PTL (Praise the Lord) moment in the Barry home this week: I’m HOME! I have been traveling NON-STOP for three weeks (I’ve been home two days in those three weeks) and it feels so good to be in Austin. I will be here for 13 ENTIRE DAYS and don’t know what to do with myself.
BUT, back to the blog. I’ve been traveling a lot. I’m not sure if it’s a forever thing or a seasonal thing, but nonetheless, I’m not here as often to make sure my fabulous daughter looks…well…fabulous. Earlier this week, I received this picture in the morning. HOLY BAD OUTFIT–I sent Matt a text saying, “It’s evident mommy is out of town” and he responded with “Why?” The problem exactly.Well, 75% of the time on Sunday afternoons, I outfit-plan for Caroline. It’s a lot easier on us in the morning when her whole outfit, down to the bow, is laid out. But that 25% of the time can turn into morning chaos or even worse when I’m out of town…so enter my great crafty idea–Day of the Week Closet Sorters. I’ve seen these for sale or in printable form, but thought I would do something myself for once {I’m known for throwing money at the problem and calling it a day.} I started googling and saw several replicable examples–most with using wooden “O” letters, but since we’re in an apartment with rack-based closets versus pole-based, I had to get extra creative during craft time.
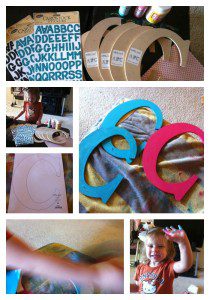
Shopping List:
-Five (5) Wooden Letter “C.” You can buy “Os” if you have closet poles. These were $2.49 each.
-Five (5) sheets of Scrapbook paper. $0.44 each.
-Acrylic Paint. We bought two colors for variation, but you can just buy one. $1.27 each
-Modge Podge. I already owned it from previous DIYs, but it’s $4.99 or so
-Foam paintbrushes. I already owned these, too, but if you don’t they’re cheap–$1.99 for a pack of 5.
-Stickers. $2.99 but they were 30% off.
TOTAL from Hobby Lobby: $36.45
1. Lay out the goods in an area you wouldn’t mind getting some paint or modge podge on. (We have an ugly old beach towel that has become our craft backdrop.)
2. Trace the scrapbook paper with the letters. Be sure to not use one as your “model” because I found out (after the fact) that not all of our wooden letters were the exact same size annnnddd it was annoying.
3. Paint the back of your wooden letters with the acrylic paint and set to dry. You can solicit the help of little hands, but understand you’ll have to do double the work and clean up said little hands.
4. While the back of the letters are quickly drying, you can start cutting away. I would make sure you have something to do to keep little helpers preoccupied at this point because you have to be extra careful.
5. Get the foam brush and the modge podge out. Flip over one of the letters (once dry of course) and apply a heavy coating of modge podge. Once applied, carefully lay the scrapbook paper on top. I used my iPhone to smooth out any bubbly areas. The first one I did was a little messy, but I got better as I progressed through the days of the week 🙂
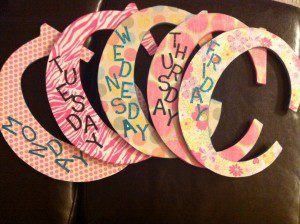
6. Repeat four times (if you’re doing Monday through Friday like me.)
7. Apply stickers to the front of the scrapbook paper to note the day of the week. I went with staggered letter placement which worked for Monday and Tuesday, but Wednesday looks a little messy.
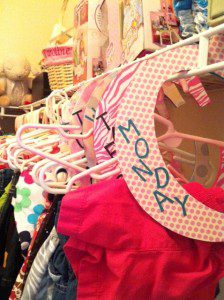
8. Admire your work in your little one’s closet.
I’m pretty happy with these little cuties. I probably spent about an hour and a half on the project and at $7 a pop, that’s not too bad.


Love the idea!!!! If I ever have another baby and it’s a girl I’m so doing this. As for being the mother to a boy, it’s all about grabbing shirts, t shirt, shoes and running out the door! He always looks cute but there’s no prep work to getting him ready 🙂