


Have you ever hung a wall gallery just once?
Or do you find yourself moving picture just a *tad* because it isn’t quite right? And then you move that same picture AGAIN because, well, now it’s too high? And then you find that you have several extra holes in your wall (which you’ll be forced to fill when you move)?


If you want to hang a gallery … and hang it perfectly the first time … follow these steps! It works like.a.charm!!
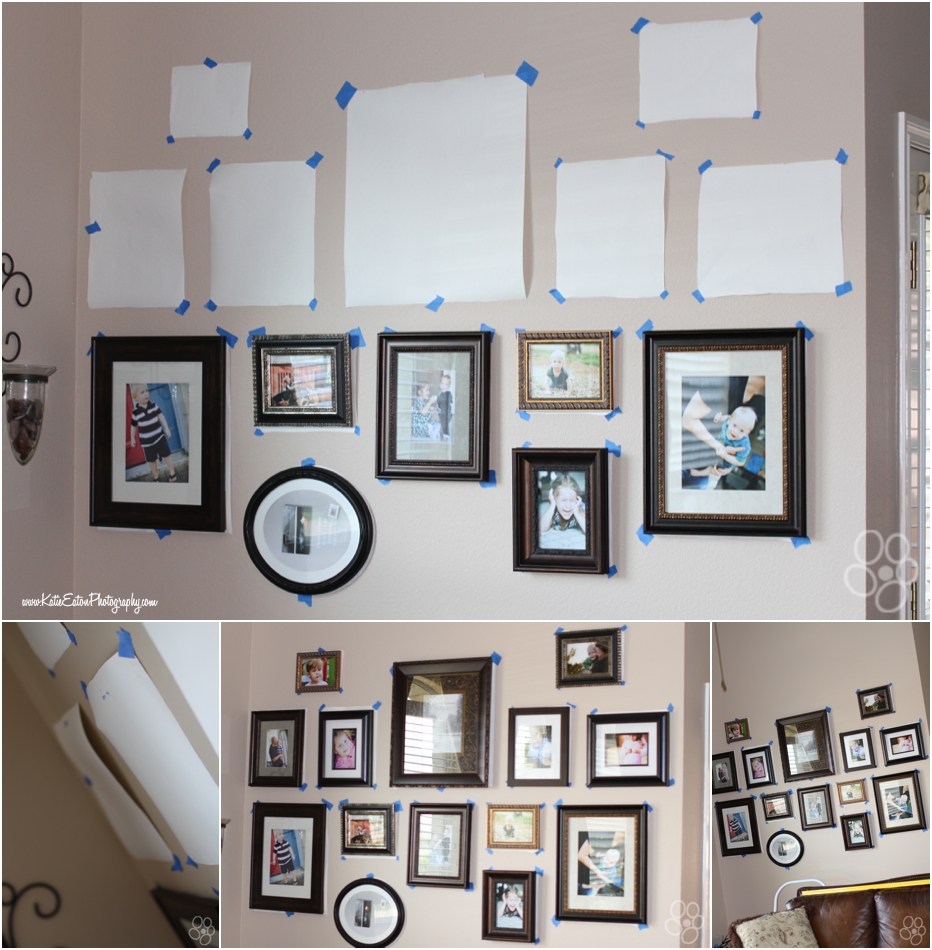
1. Create your gallery design with frames on the floor
2. Get butcher paper or a large roll of paper
3. Trace the frame size and then cut out
4. Use painters tape to hang the paper on the wall exactly how you want it to be (so, use a level to make sure it’s straight, and get out a ruler to get equal spacing between the frames)
5. Use kids paint on the bracket on the back of the frame and then press it to the paper on the wall (or you can do a ruler and measure, but I found the paint to be quick and easy).
6. Get our your hammer and nails and nail in where the paint shows on your paper
7. Hang your frames!
Voila! Yes — it’s time consuming. BUT … when your done hanging everything, it’s level, evenly spaced and you’ve only hammered one nail per picture!

PS: I know this isn’t exactly that *crafty* but I still haven’t made this candy cane vase I want to do … but when I do, I’ll be sure to photograph it and post because it looks beautiful on line!


