


As parents, we accumulate a lot of “stuff”. Some recyclable, some not. Today we are taking everyday household trash and turning it into something to decorate your home with and be proud of! I guess one woman’s trash really is another woman’s treasure. From Diaper boxes to Pringles cans, we’ve got something for everyone today.
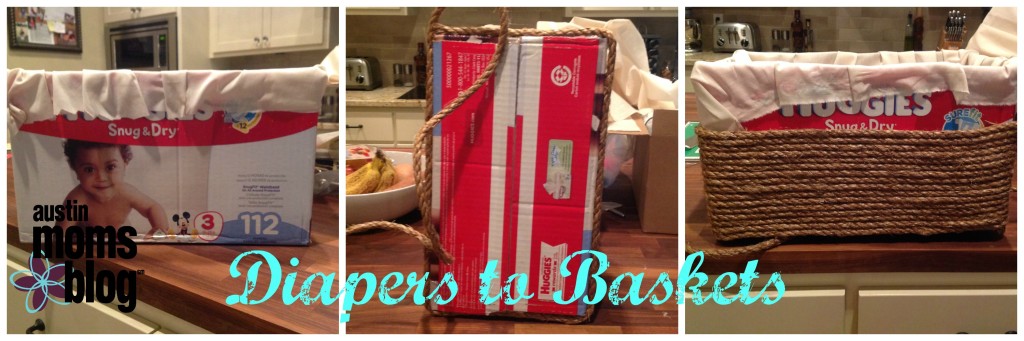
Diaper Box Turned Basket:


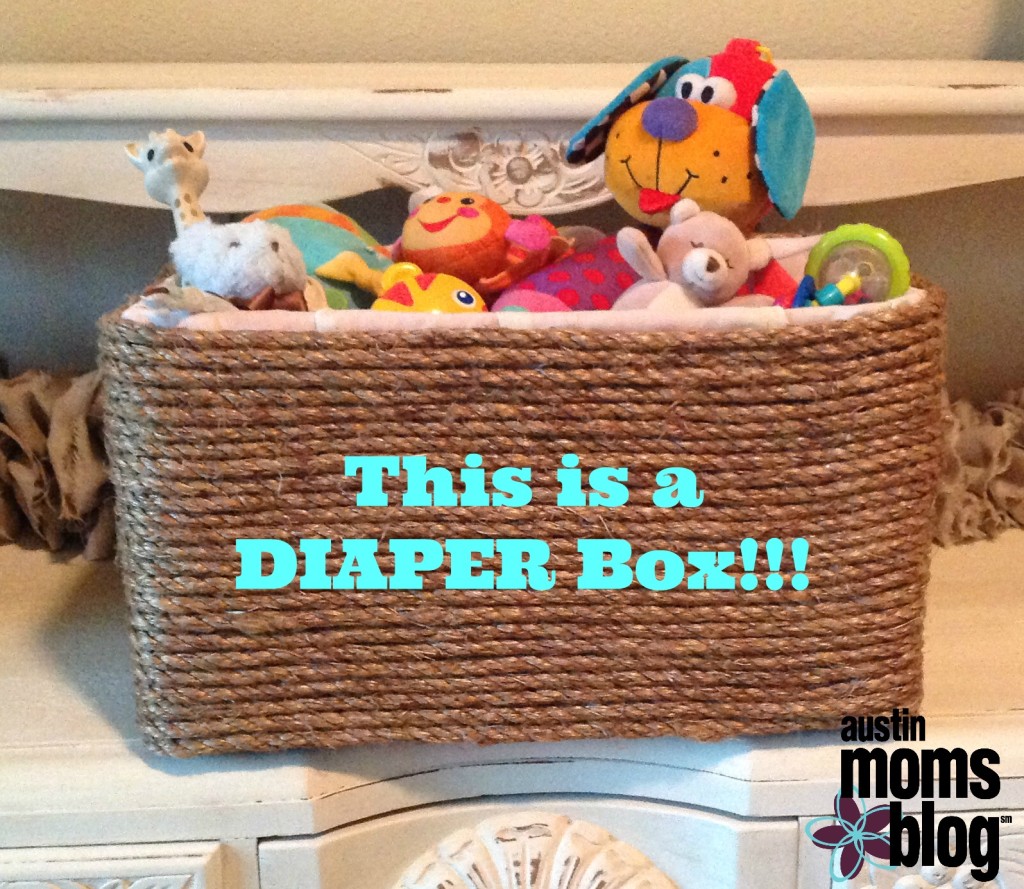
- We have actually stolen this idea from our Sister Site, Red Stick Moms Blog. Rather than reinventing the wheel here, you can find a step by step tutorial to create your own basket right, here!
But, here’s a picture step by step of how AMB completed it!:
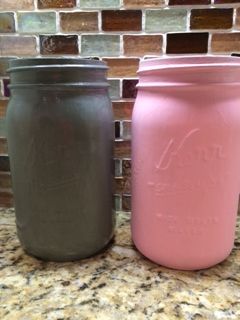
Mason Jars Turned Adorable Potted Plants:
- The very first thing I did was paint them with chalkboard paint. I wanted the black so that when I distressed it at the end the black would show through and give it that shabby look I was going for. The reason I did the chalkboard paint instead of just black paint is because it adhered to the glass better.
- Once the chalk paint was completely dry I started to spray paint the jars the colors I wanted with just regular (you could use craft paint though).
- I let each coat dry before I re-sprayed. After all coats were dry, I went over sections of the jar with the same color craft paint just to make it more smooth.
- I used a sanding block and started roughing them up so you could see the black showing through. I used a clear matte finishing spray on the jars to help them keep their color when outside.
- I haven’t had the chance to pot succulents in here yet, but I know when I do, they’re going to be AMAZING!

Pringles Cans Turned Spaghetti Noodle Holders/Decorative Piece:
- Smear some glue over the sides of the Pringles can, small sections at a time.
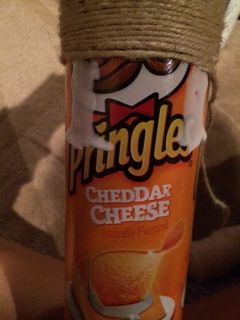
- Start wrapping the twine from the bottom part of the Pringles can.
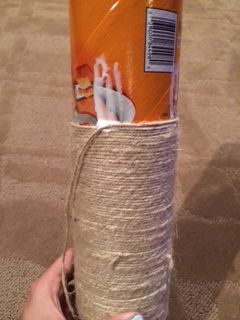
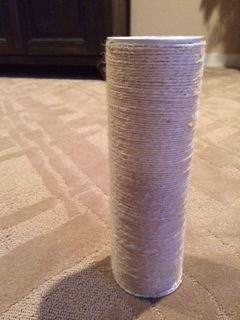
- Make sure that there are no gaps as you wrap the twine around the can all the way up.
- Cut the twine and glue to end on top of the rolled twine. If it’s done correctly, the end can’t be seen.
- Cut leaf shaped pieces from felt or any other type of stiff fabric. I used pieces of burlap. Cut them into leaf shapes and painted the shade of green I liked best.
- Glue the leaves to the can first.
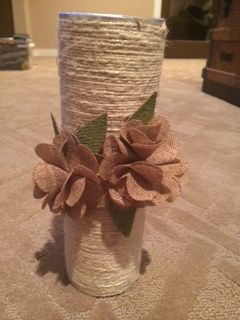
- Add some faux flowers or anything that looks cute. I bought flowers and just glued them to the can, but you can also make your own {tutorial, here}. Allow to dry.
- I also made a couple more with different shades of twine with no embellishments except the ribbon on top. My husband uses this for a spaghetti noodle holder.
Oatmeal Container turned Headband Holder in 5 minutes!
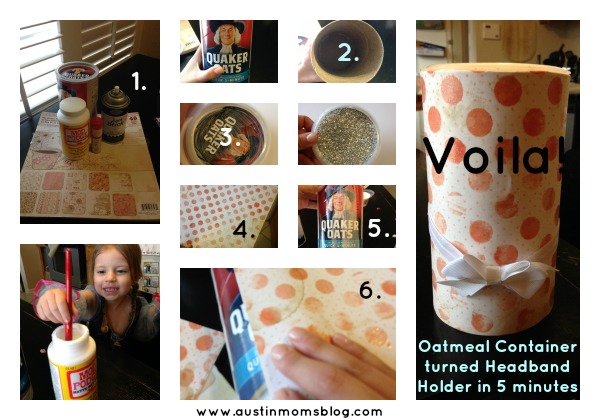
We blogged about this back in the day and thought it was time for a revival. This took literally five minutes and that includes my little helper (still dressed in her Anna costume from the Frozen Sing-along) dripping Mod Podge on my table!
- 1. Supplies-You’ll need some scrapbook paper, Mod Podge, a paint brush, an empty oatmeal container, scissors, some glitter and 5 minutes of your life.
- 2. Make sure you’ve eaten all of your oatmeal! We have oatmeal on a regular basis, so this wasn’t a challenge for us. If you don’t eat oatmeal, you can try doing this same craft with a formula canister OR if you’ve outgrown formula and aren’t an oatmeal eater…you can pick up a can for $2.99 at Target and just get on with your craftin’ self.
- 3. The first thing I did was take the lid off and glittery-it-up! To do this I simply added some Mod Podge to the lid and sprinkled glitter on it. This took the longest to dry.
- 4. Next my daughter picked a piece of scrapbook paper she liked for her room.
- 5. Apply Mod Podge to the container. The cardboard of the oatmeal container will soak up some Mod Podge, so apply liberally.
- 6. Start to lay your scrapbook paper on top of the glue. I also put Mod Podge on top of the paper as I was laying it on.
- 7. Voila! You’re done. This will dry in an hour or so and then it’s ready to go.
What trash have you turned into treasure? We are always looking to feature new crafts!
***If you missed Co-founders, Allison Mack and Vanessa Barry this morning on Fox 7 News Good Day Austin, here’s the clip!***


I used you basic idea and I made a bed and a toy for my cat! Thank you for sharing! You really inspired me!