


Bring on Spring.
We can finally see the light at the end of this winter tunnel. Springtime and sunshine are on the horizon, and I for one, have never been quite this happy to see winter go. I’m grateful for cold weather and the opportunity to wear one of my 17 scarves. I love comforting soups and snuggling with my babies, but I think we can all agree that this winter has been a doozy in the health and wellness department. Bring. On. Spring!
I’m a self-proclaimed fall fanatic, but there is definitely something about Spring that is uniquely gratifying. It is a time for renewal and fresh starts. I love to do a *little* spring cleaning because let’s face it- it’ll be a disaster zone again in 20 minutes with 2 little ones running around.


I also love to do a little DIY when the seasons change. If you’re rolling your eyes because you hate DIY, just hang with me for a minute. If you know your limits and have a plan, DIY has some great perks: it saves money, your creations are 100% unique, and it makes my earthy heart happy to reuse and repurpose objects.
My Pinterest boards make me look like some sort of cross between Joanna Gaines, a Michelin Star chef, and a DIY goddess, but don’t be fooled. Really I just watch Top Chef, own an Instant Pot, make my own non-toxic cleaners, and do the SIMPLEST crafts I can possibly find.
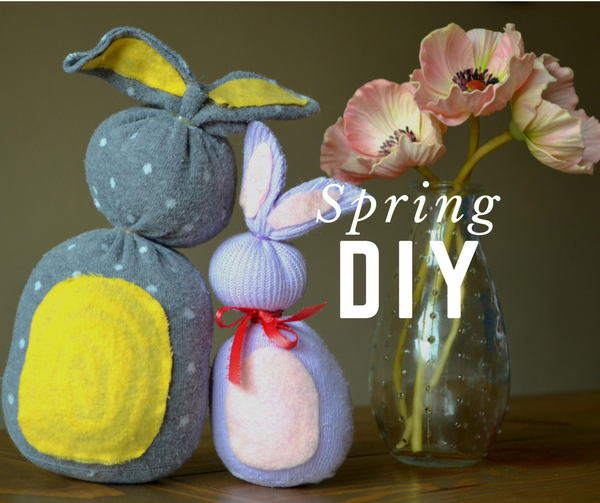
So let’s get started! I have 2 projects for you today that bring about the refreshing smells of spring and add a little Easter cuteness to your home.
No-Sew Sock Bunny
I made these last year when my daughter was about 6 months old. It turned out to be one of my favorite little crafts that doubles as Easter decor and a baby keepsake. I love it because its easy enough to get older kids involved, and you can most likely make it with things you already have laying around your home.
Here’s what you need:
Baby or toddler sock
Stuffing
Rubber bands
Felt or other scrap fabric
Ribbon or string
Scissors
Hot glue gun
Gather up your materials first and don’t be afraid to get resourceful. I bet you can find everything you need without running to the craft store. I find that socks with a ribbed top work great for sturdier ears, but any will work. And you finally have a use for all those single socks that lost their partner in the laundry! A pastel, a fun print, or a bright color will make it extra cute.
You’ll also need a few rubber bands. Those tiny clear hair bands are perfect. Then find some flannel, felt, or even an old t-shirt in a matching color. For the inside of your sock bunny, you’ll need some stuffing or a bunch of uncooked rice or beans. If you happen to be spring cleaning and have an old stuffed animal in the giveaway pile, consider grabbing some scissors and re-using the stuffing. I caution doing this little procedure in front of a pint-sized drama queen (or king) if you’d like to avoid a meltdown. Then grab some coordinating ribbon or string, your hot glue gun, the scissors, and you’re good to go.
Take your baby sock and fill it up with your stuffing about 2/3 the way to make the body. Shape it nicely then secure it with a rubber band.
Now fill a smaller section with stuffing to be the head. Again, shape it nicely and secure with a rubber band. The remaining fabric at the top will be your ears. Use your scissors to cut down the middle and trim out some ears with 2 layers of fabric. Squirt some hot glue into each ear so it folds onto itself. The glue will also help each ear stand up.
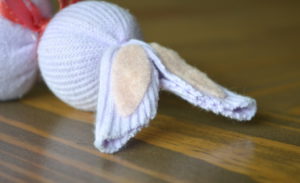
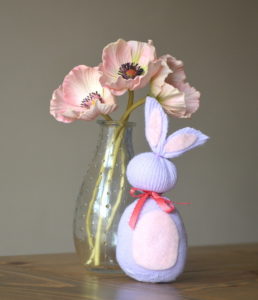
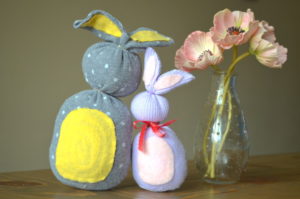
Tie a ribbon around the neck. If you don’t have ribbon, consider grabbing one of your daughter’s newborn bows and repurposing it. You could even cut a strip of fabric out of an old onesie. Next, add a belly with an oval of felt (or other fabric) and some hot glue (or fabric glue). If you want to get fancy, you could even glue some felt in the ears. If you sew, you can stitch in some eyes with a needle and thread. But as you can see, I skipped that step.
My 4-year-old son helped me repeat the process with a bigger sock. I just love how they turned out! These precious little bunnies are one of a kind and perfect for Easter.
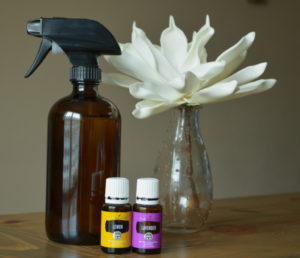
Room & Fabric Spray with Essential Oils
It’s no secret that air fresheners, fabric sprays, and anything with the ingredient “fragrance” contains harsh toxins that are simply not good for us. We choose to avoid them completely in our home and instead use our beloved essential oils for anything and everything. This simple recipe can be used to spray down fabrics, rugs, dogs, kids, or just to freshen up a space. Sort of kidding about the kids and dogs. But I wouldn’t rule it out!
Here’s all you need:
Glass or plastic spray bottle
Distilled water
Vodka or rubbing alcohol
Essential Oils
If possible, find a glass bottle around your home that needs a new lease on life. Something like an old vinegar bottle will be perfect. Then take a spray nozzle from an old cleaner, give it a rinse, and see if it fits on your glass bottle. I find that a lot of these are universally sized.
Otherwise, get yourself a nice glass spray bottle. 16oz is a great size, but anything will work. If you choose to use plastic, it will be okay, but the essential oils may eventually erode the bottle over time. I prefer glass because it’s pretty, it’s eco-friendly, and it works best with essential oils.
Fill your bottle about 1/4 of the way with either Vodka (not a delicious flavored Deep Eddy, please – save that for yourself) or rubbing alcohol. Then add 10-30 drops total of your favorite essential oils. Base the number of drops on your preference and the size of your bottle. For my 16oz bottle, I am using 15 drops of Lavender, and 15 drops of Lemon. This is my absolute favorite combination for spring. It’s clean, fresh, and relaxing. You could also try the odor-eliminating blend called Purification.
Then fill the rest of your bottle with distilled water. Gently shake to combine, and spray whenever and wherever you like! If it isn’t strong enough, add a few more drops until it suits your liking.
Easy peasy – DONE. See? I promised to keep it simple. I hope you enjoy!
D0 you Spring DIY? I would love to know what you make this time of year!


