


When my oldest started school, it soon became very apparent that gift giving, though not mandatory, was pretty much expected by both parents and teachers. Now that both of my boys are in school, the amount of gifts has doubled. I, for one, refuse to go and spend a ton of money on a couple dozen gifts for all the classmates and teachers. Besides, why spend money when you can do it yourself or have your kids do it with you.


Now Valentine’s Day is just around the corner again. It is glaring at us in every store that is filled with red and pink hearts, candies and gifts of course. But why buy into the Hallmark tradition when you can make your own gifts? If you have little ones and enjoy crafting with them (especially on chilly or rainy days when you cannot let them play outside) there are so many things you can do. Pinterest is full of incredibly creative ideas for all. My little ones are two and four years old so we keep our crafts simple yet oh so fun.
Here are some of my favorites and how we made them.
Toilet paper hearts
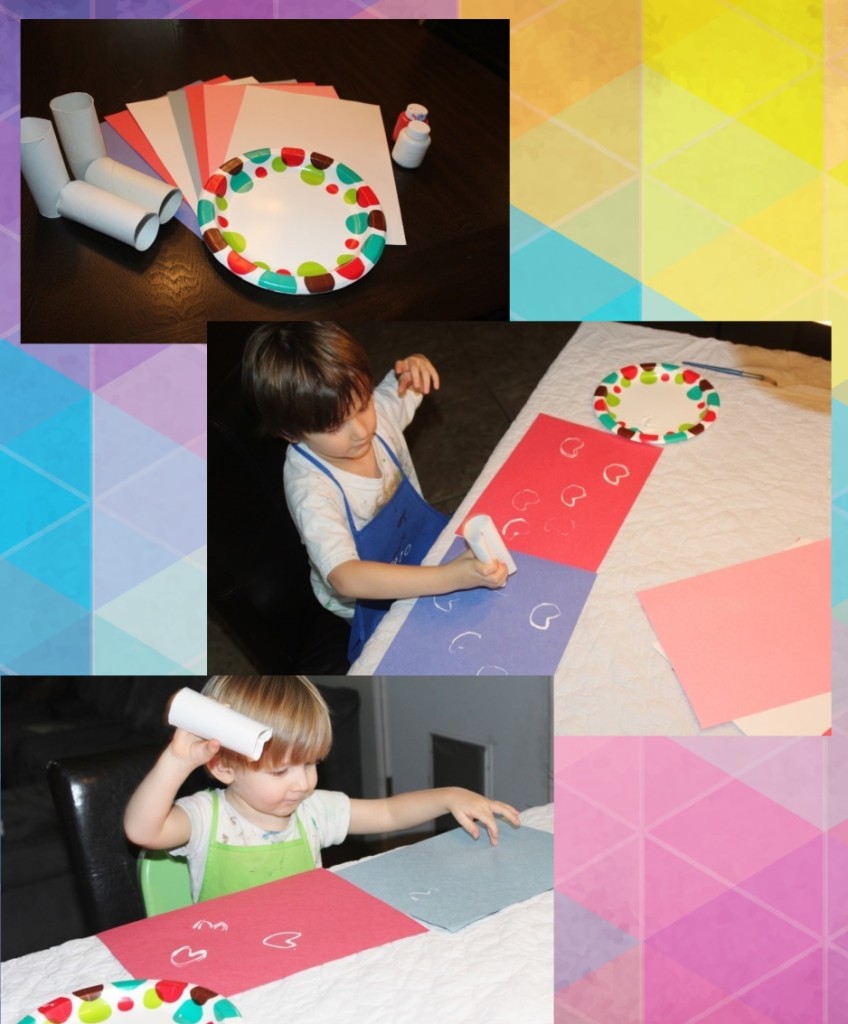
This one is so simple to do and the boys loved it. You probably already have the few things you need at home already.
- Construction Paper
- Paint (always washable paints in my house)
- Toilet paper rolls
- Paintbrushes (just in case they want to keep painting like mine always do)
All you have to do is shape the toilet paper rolls into a heart by pinching in one part of the roll and you have a heart shaped stamp.
Then set up the paints on paper plates for easy cleanup. Now simply let them stamp away on the paper. Keep switching out the paper for them so you have multiple sheets. If you have heart shaped cookie cutters, you can use those as well. Just make sure you wash them very well before you bake again. The toilet paper rolls can just be thrown away. I’m all about easy cleanups.
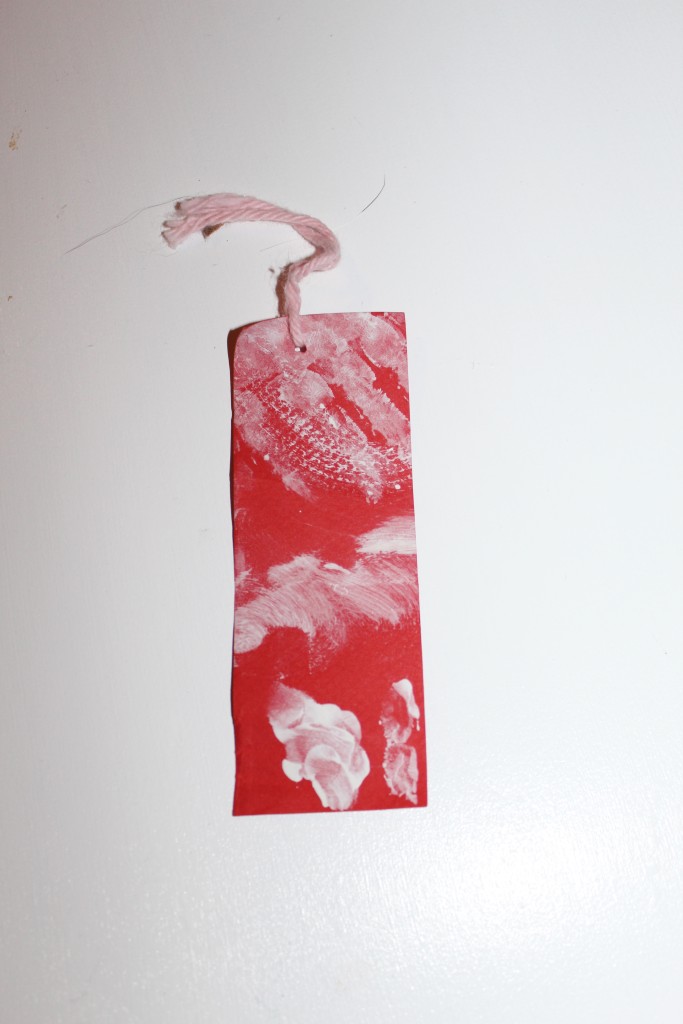
Finished Product

Bookmarks
Once you have the heart stamped sheets, you can make bookmarks out of them if you like. We did this when my oldest was 2. I cut the sheets into strips, punched a hole on what you want to be the top end of the bookmark and tie a piece of yarn through it. We then took all of our bookmarks to our local nursing home to wish the residents a happy Valentine’s Day. That was the most rewarding part. The people there were so nice to my son, they just wanted to talk to him. It was beautiful.
Head to toe
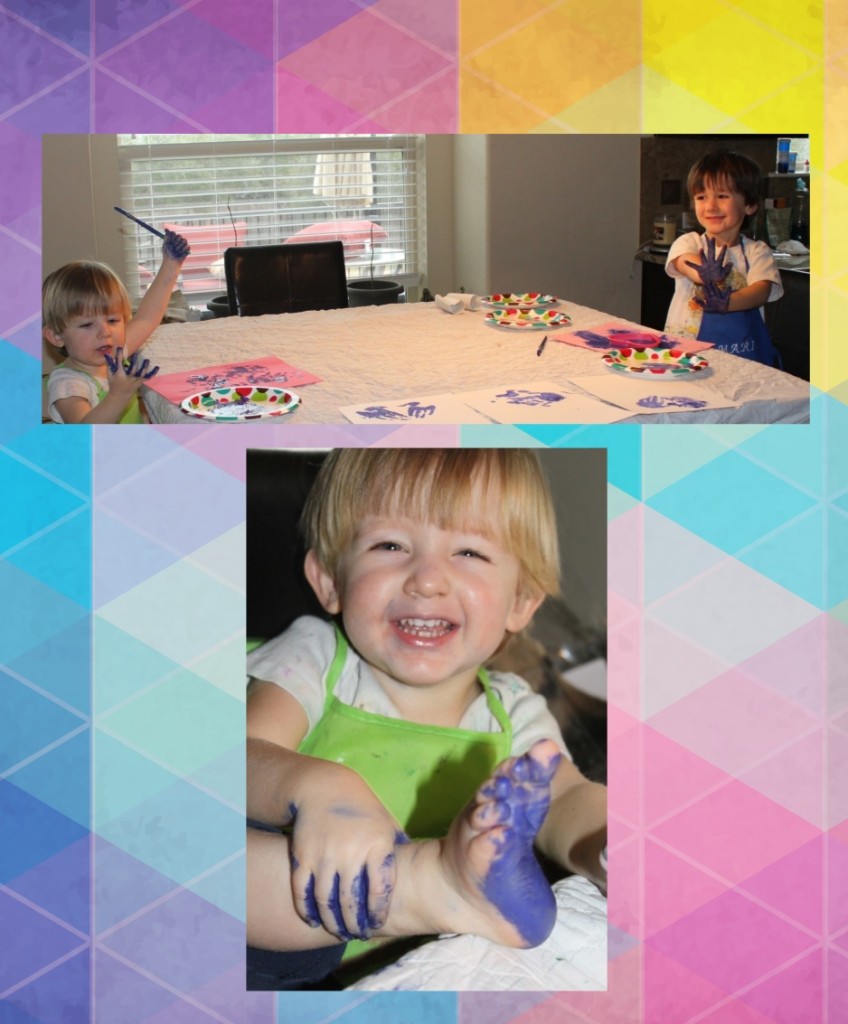
Here is what you need:
- Paper
- Paint
- A willing little participant
- Glitter (optional)
- Paper plates for them to get their hands all nice and covered (I probably wouldn’t let them do the feet themselves so they don’t leave footprints around the house)
- Wet rags to wipe before they run and paint the walls
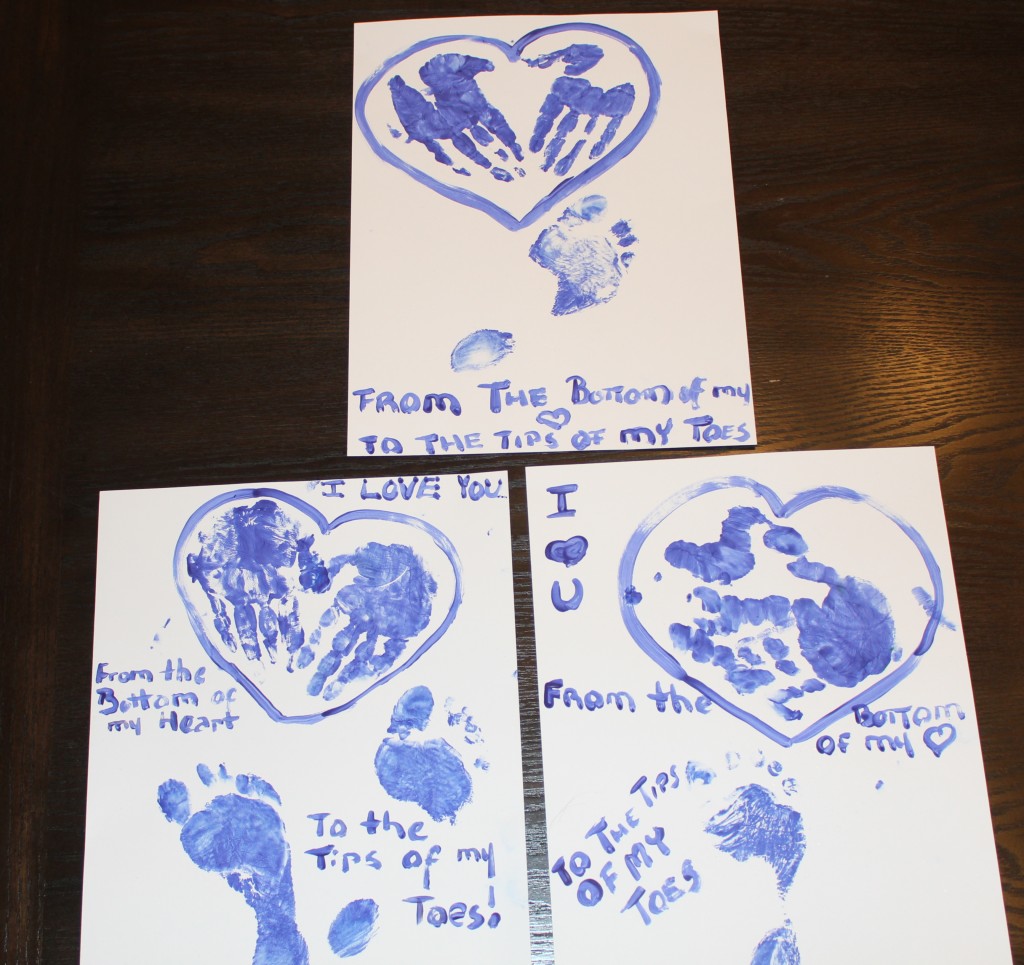
This one is especially fun with little babies because their hands and feet are so deliciously tiny. You simply paint their hands in the color you choose and make a heart with their hands at the top of a sheet and put a footmark at the bottom of the sheet.
You can sprinkle with glitter before it dries if you like. When it’s dry you can draw a heart around the hands if you like and write “I love you from the bottom of my heart to the tips of my toes” with the same paint. It is a simple yet a beautiful reminder for the future of how small they were. These are great gifts for family members, especially grandparents.
Finished Product:
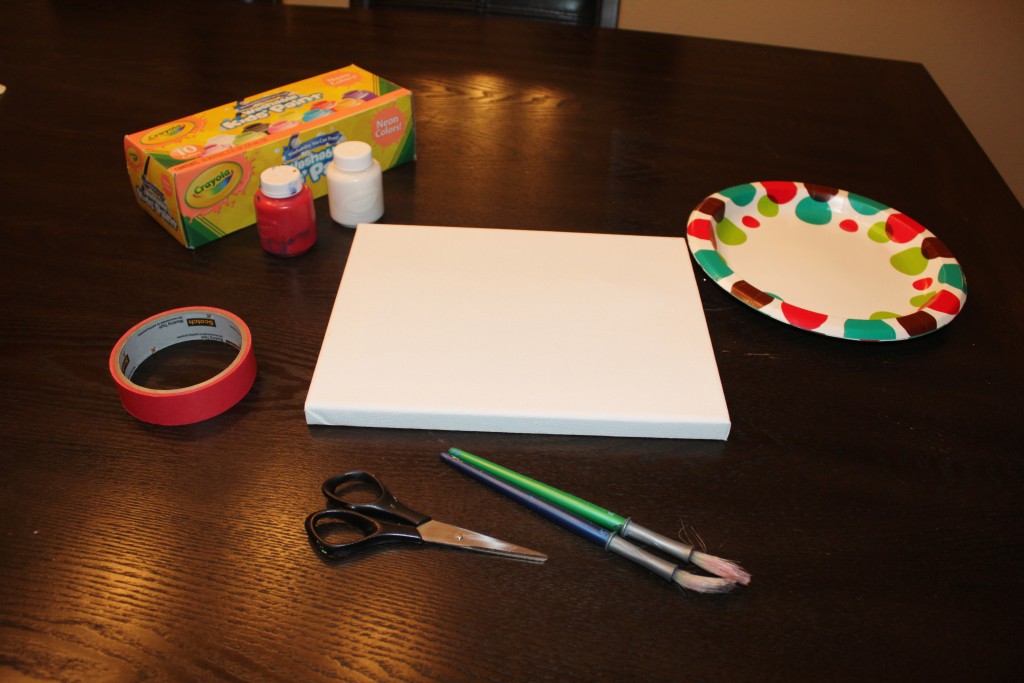
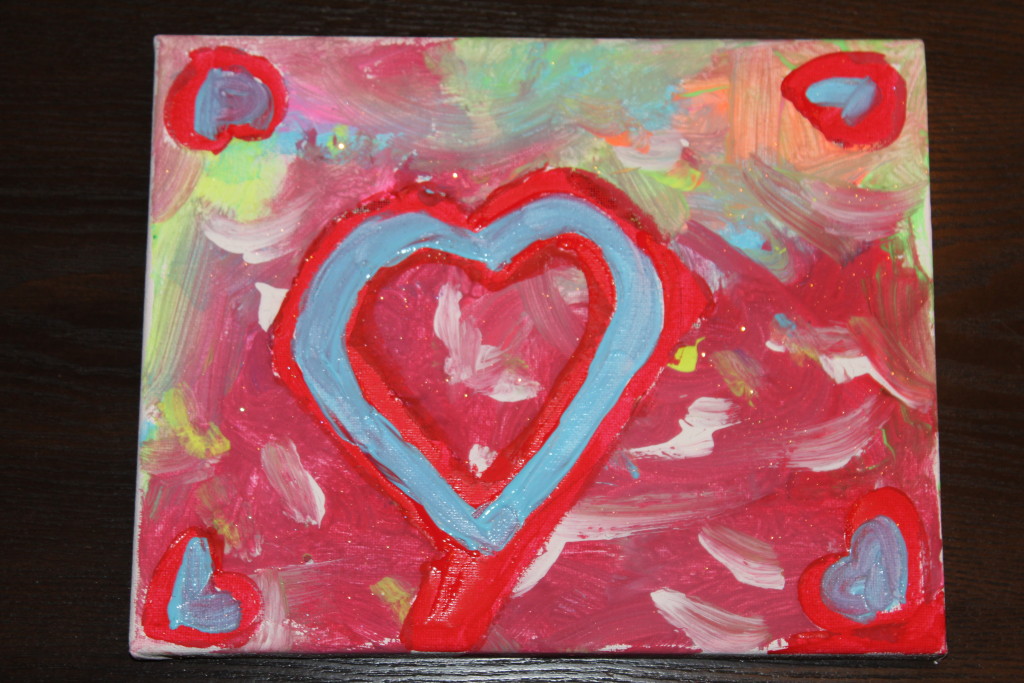
Heart Art

Here is what you need:
- Mini canvas or paper
- Paint
- Tape
- Paper plates
- Paintbrushes if you don’t want them to finger paint
- Glitter (optional)
Make a heart shape on a piece of paper with your tape making sure to let the ends stick up a little for easy removal. Let your little ones paint away. You can sprinkle with glitter before it dries if you like.
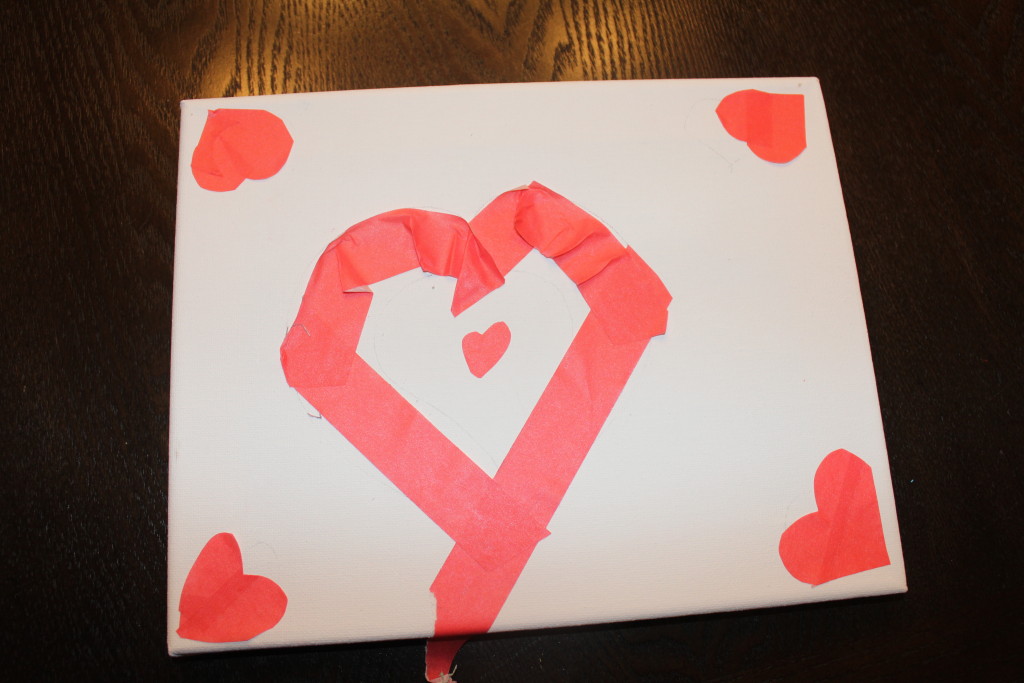
Once the paint is dry, take the tape off. You can fill in the parts that remained white with paint or leave white. My boys love blue so I painted the insides blue for them. Now you have a pretty art piece good enough to hang.
The finished product:
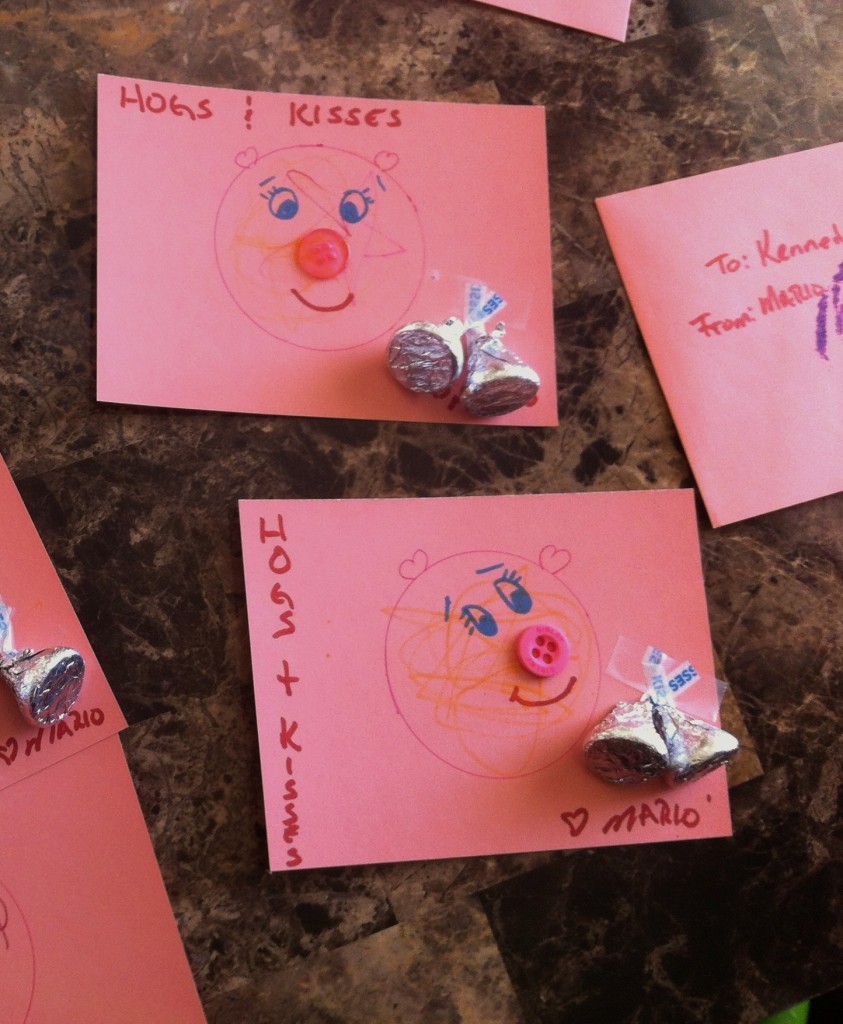
Hugs and Kisses
Here is what you need:
- Pink construction paper or pink cards and envelopes (I found a box of blank colored cards and envelopes two years ago at Michael’s for cheap that I am still using)
- Markers
- A cup or glass to trace a circle from
- Buttons
- Chocolate Kisses
We made these for my oldest preschool last year and they were fun to make. I drew the circle on the cards and added let him color the cards with a marker and glue a button to it. The only thing I asked was that the button be glued on the inside of the circle. I drew the face to match where the button ended up. This made each little pig was unique since not one was looking the same way. My art skills leave a lot to be desired, but they were only 3 then, don’t think they criticized me too much (at least not to my face.)
The Finished Product:
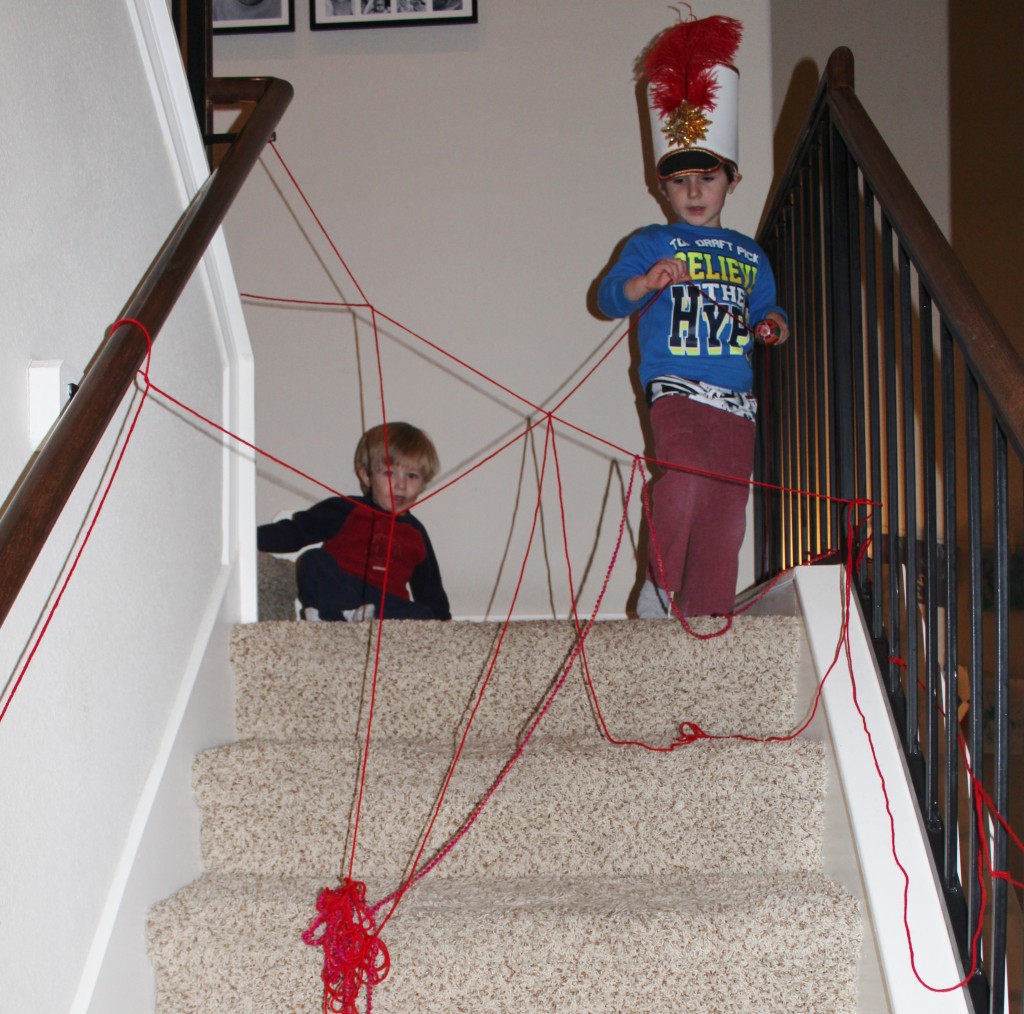
Yarn Heart
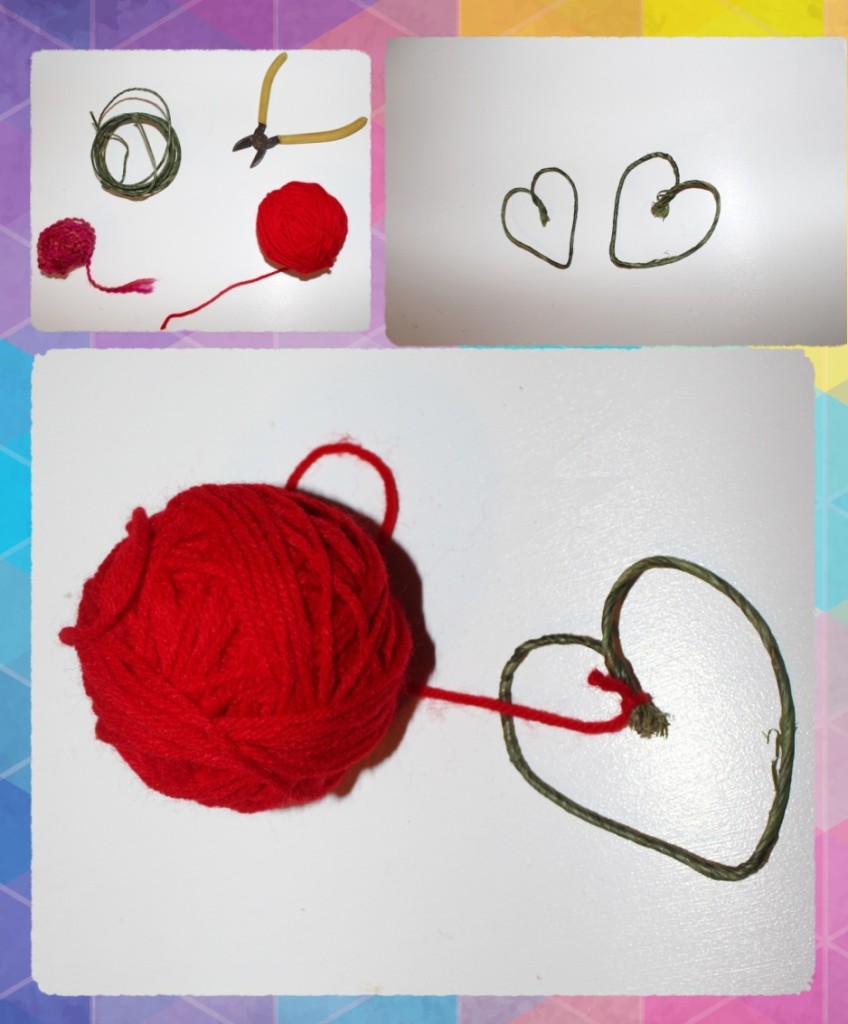
Here is what you need:
- Floral Wire
- Wire Cutters
- Yarn
- Scissors
Cut a big enough piece of the floral wire to make the shape you like. Twist the ends together to hold your shape in place. Start wrapping the yarn on the ends to help get the kids started and let them wrap to their hearts delight. Don’t expect perfect patterns from little babies, whatever they create will still be lovely.
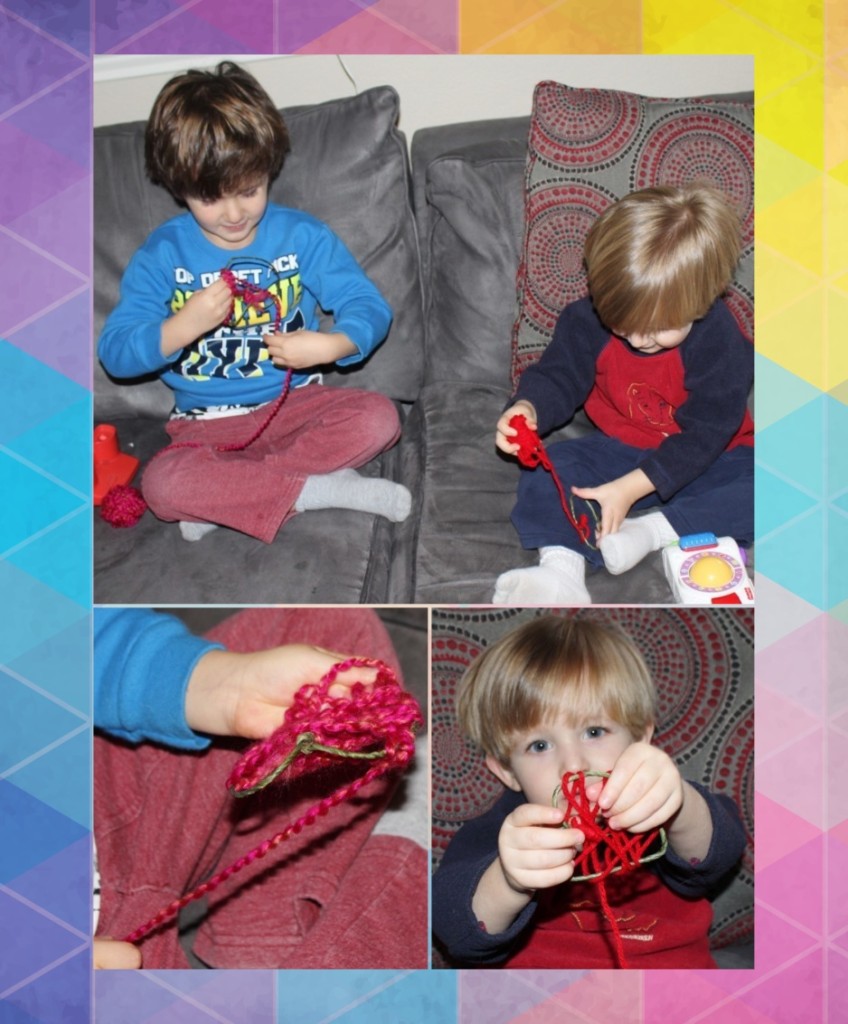
Make sure you take the yarn when they are done or else this might happen. 🙂
Finished Product

Crystals
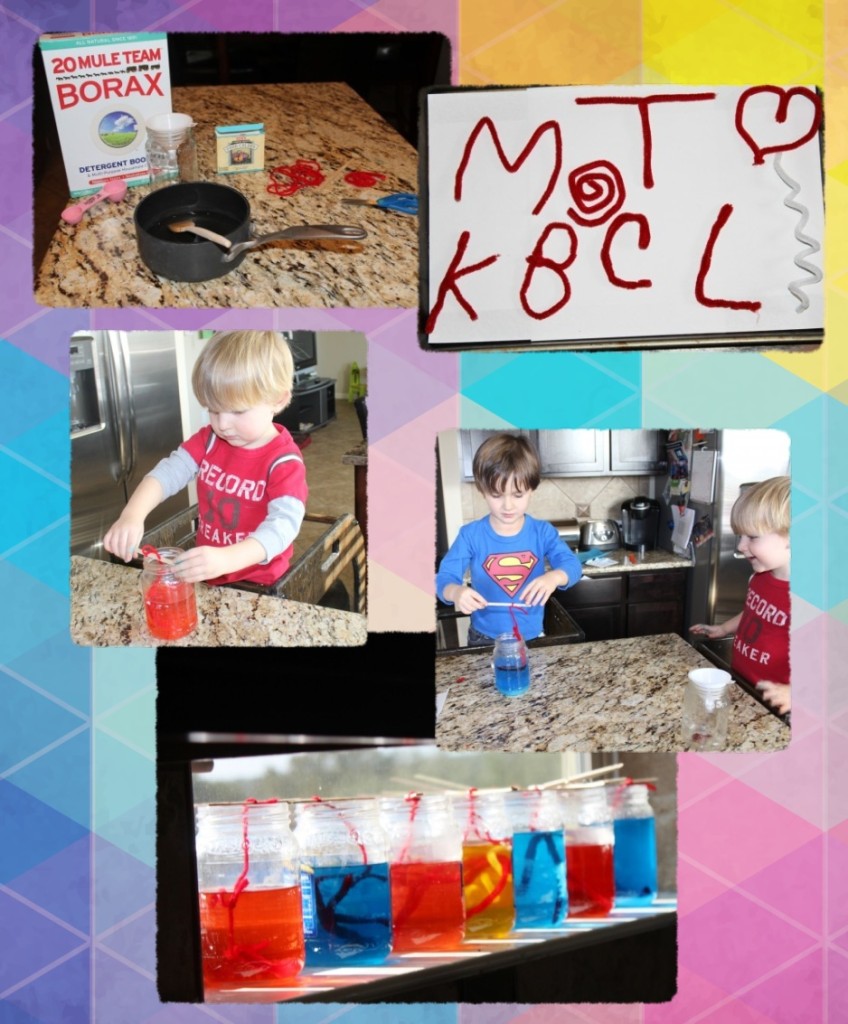
Here is what you need:
- Pipe cleaners
- Yarn or string
- Wooden sticks
- Food coloring
- A pot of boiling water
- Borax (found in the laundry aisle)
- Glass containers (I knew those pickle jars I had been hoarding would be good for something one day)
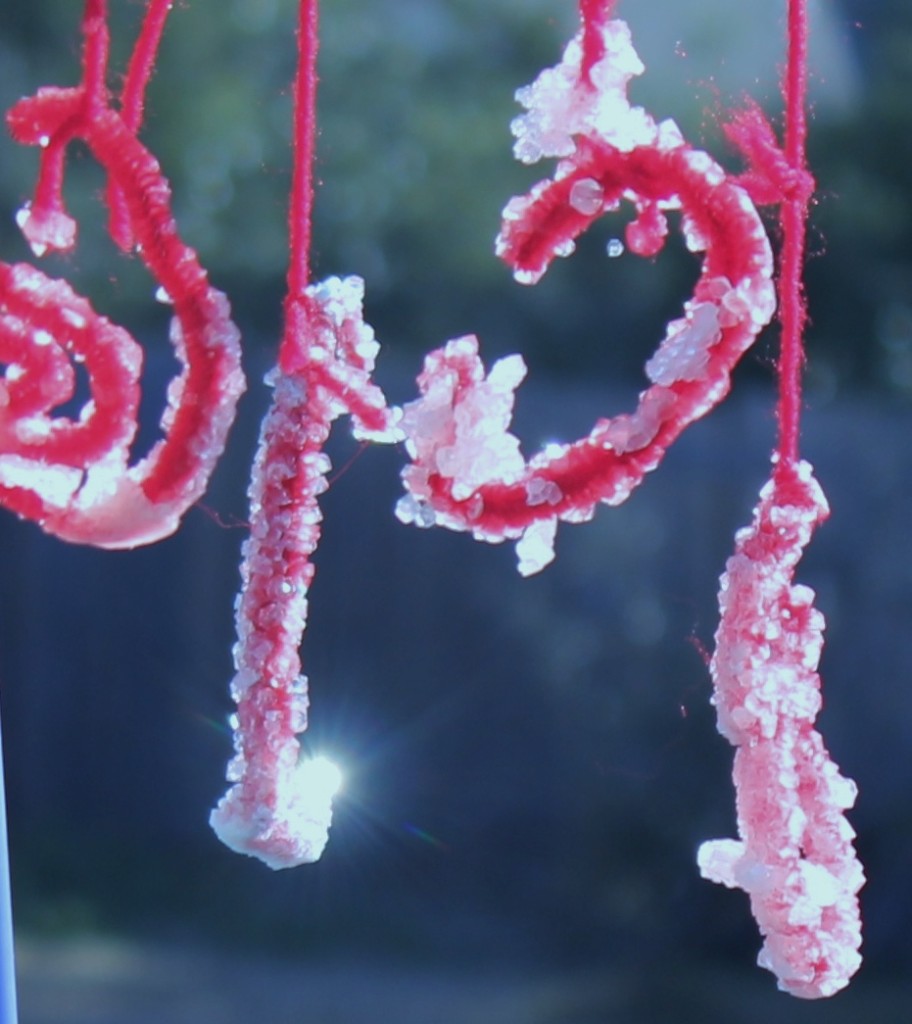
This is a great science project for kids. I would recommend you take care of the boiling water and mixing part, though. I had them pick their colors from the food coloring bottles we had and let them squeeze some drops into each jar. Then I asked them to help by making the shapes they want out of pipe cleaners and tie them to the sticks while I took care of the mixture. (They picked their initials as well as their teachers’ initials, hearts and silly shapes.) Mix your boiling water with the borax. We used 3 tablespoons for each cup of water. I let them watch me carefully pour the solution into their jars so they can see the water turn into the colors in the jars. That was fun for them to see. Then let them (if you dare) place the shapes into the solution making sure they do not touch the jars (they get really hot). Also, make sure the shapes do not touch any part of the jar or else they will crystalize onto the jar and it will be very difficult to remove them, trust me. Place them out of reach overnight. The next day, let them pull them out watch their surprise when they see their shapes covered in little crystals. Allow them to drip dry for a bit, though.
Finished Product:
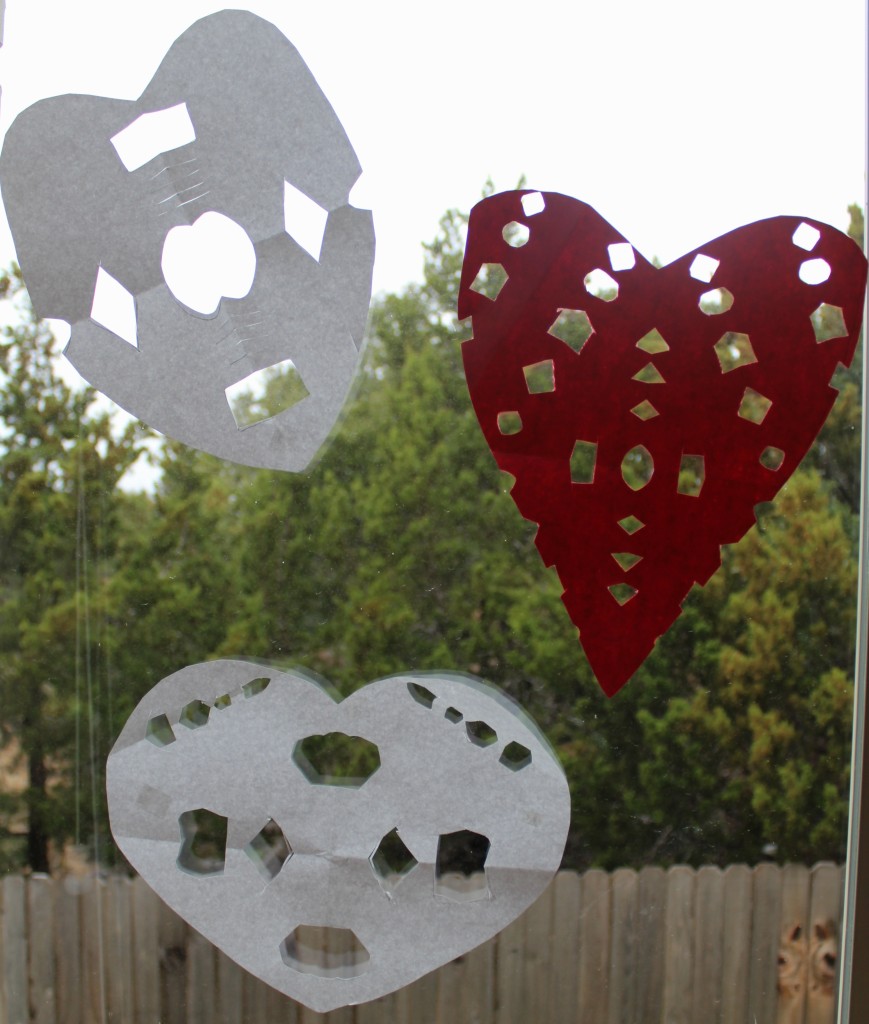
Papel picado heart

Here is what you need:
- Construction paper
- Scissors
I love the papel picado (pierced paper) crafts from Mexico. I know it is mainly used during Christmas, but I decided why not add it to another holiday. I cut out large hears out of each sheet of construction paper. I then folded it up as much as I could without making it too thick for little hands to cut through. I drew some shapes on the folded parts and let the kids cut the shapes. This is great activity for motor skills. Let them open up the paper themselves to unfold their creations. My kids loved seeing what they made themselves. If you have older kids, you can do this with tissue paper as well. It would be more authentic that way and look beautiful. Mine seem to have an obsession with tearing tissue paper into tiny little pieces I tend to find weeks after they got their hands on it.
Finished product
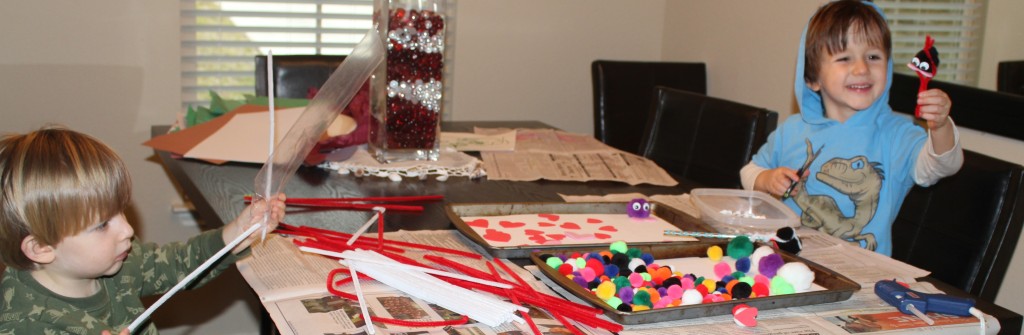
This last one is my favorite and the one I decided to make for school. So if you are in my kids class, sorry to ruin the surprise. I found these pencils at the Target dollar bins (always my first stop) and bought them before I realized what I wanted to make. Then I started searching on Pinterest and found quite a few ideas. These are my favorites.
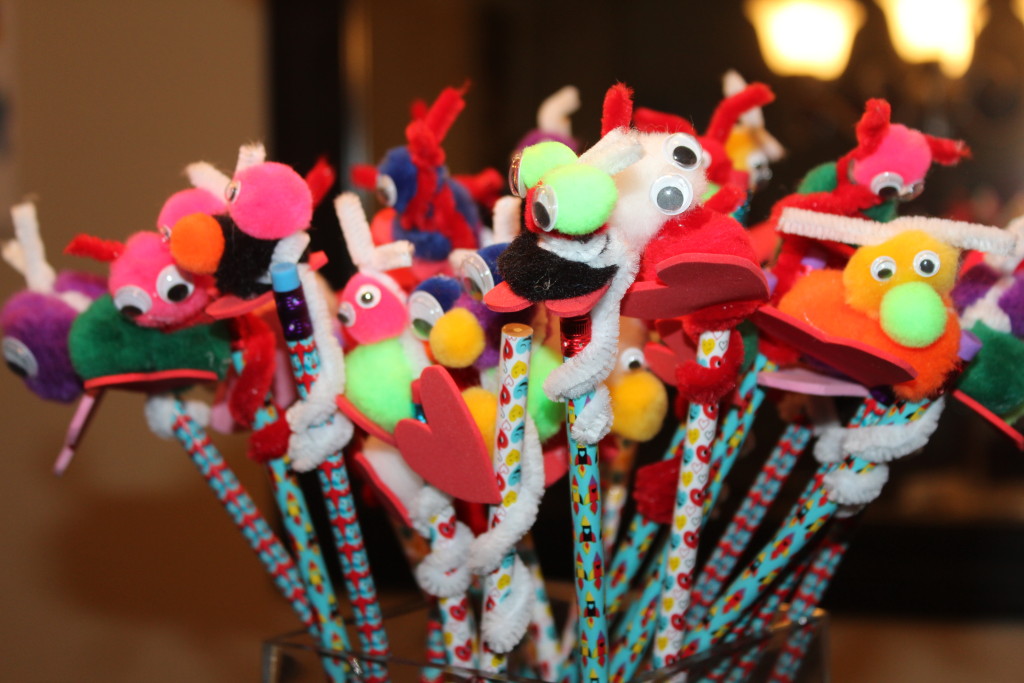
Love Bug Pencils
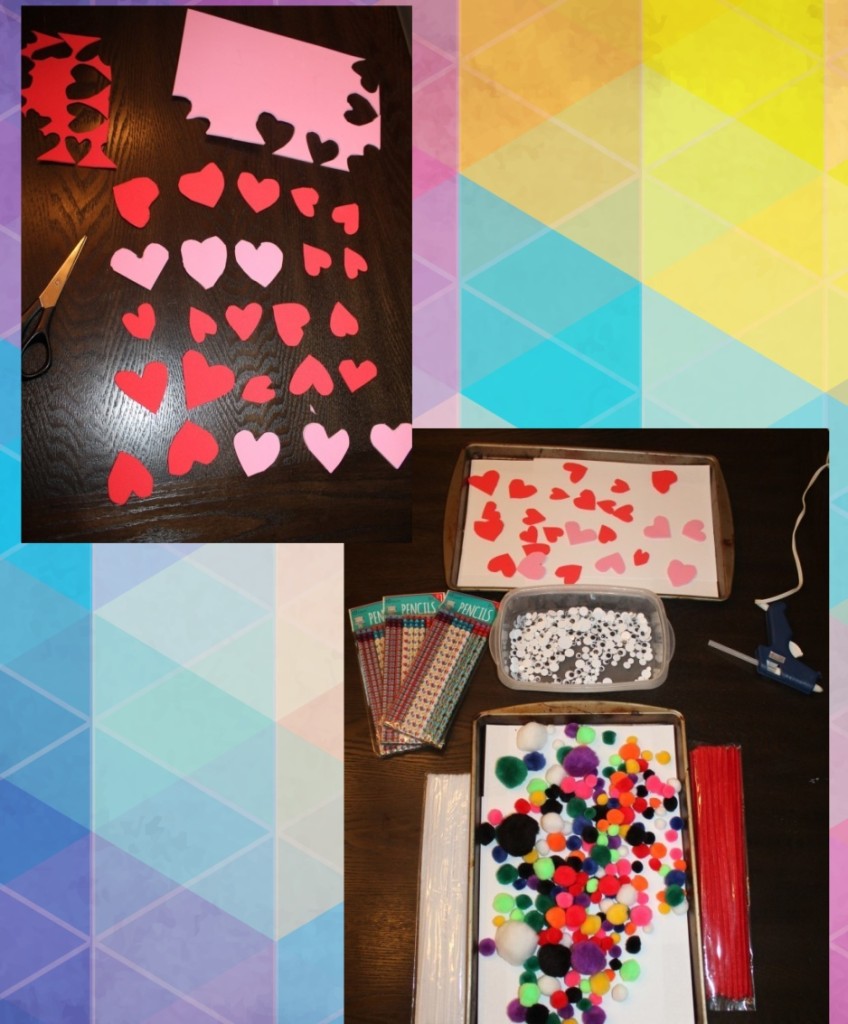
These little love bugs are all over Pinterest and I think they are so cute. The only trouble is that you have to use a glue gun. If you have very young children, then I may not do this one with them. Another way to be able to do this is to let them pick out the bug parts and you control the glue gun. This would work if my kids weren’t so independent and think they can do all on their own. My workaround, have T pick parts and M use the glue gun without getting too close to anyone and never unsupervised. Last time he was allowed to use one, he did accidentally burn me. I will have them sit apart from each other just in case. I will set us up more like and assembly line.
Here is what you need:
- Assorted Pom-poms (found in any hobby store like Michaels)
- Eyes (I found a big bag of them at Oriental Trading Company)
- Pencils
- Glue gun
- Pipe cleaners
- Foam paper
- Scissors
First cut out hearts to make the little critters feet. They don’t have to be perfect since that is what the balls will sit on. hen get your glue gun ready to go. Glue the feet to the balls and then the eyes to the part of the ball where the curves of the heart are so they look like feet. Hint from my own painful experience. Set your eyes upside down where you are working. Then put the glue on the furry balls instead of the eyeballs themselves (especially the tiny ones) to avoid burning your fingers trying to attach them. That glue sticks to you and continues to burn and that is no fun, trust me.
The Pinterest bugs I found also cut up the pipe cleaners and glued them like antennas to the top of the bug. I thought that I had already tempted fate enough letting a four year old run the glue gun, so I decided to just twist those into shape. Let your kids twist them around the bug with the ends pointing up for antennas and enough still hanging down to wrap around the pencils. I didn’t want to glue them on the eraser end either so that their friends could still use the pencils and erasers on them.
Here are our cute little love bugs. What do you think?
Now sit back and enjoy your kids’ master pieces.
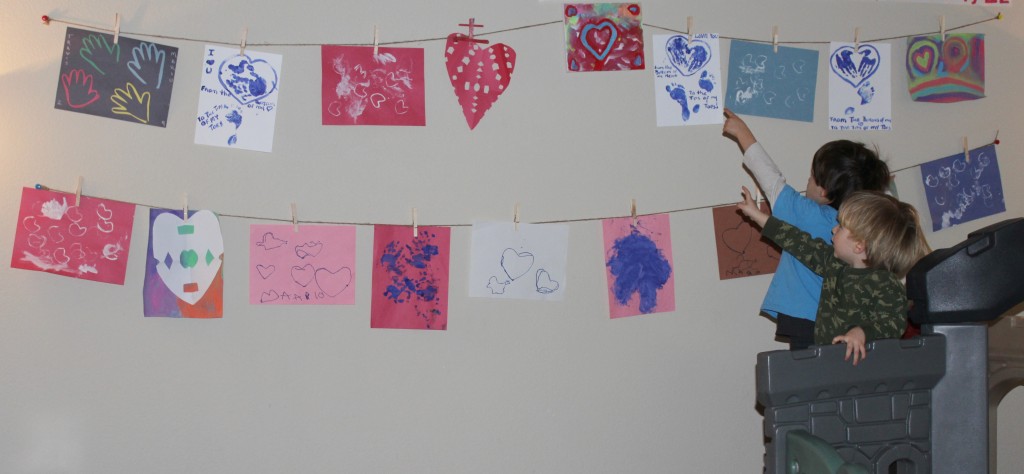
What’s the best part about craft time with your little ones? For me it is the look on their little faces when they create something new!
I hope you enjoyed our little projects. I hope we made the Pinterest sites that gave us the ideas proud. What crafts do you like to do with your little ones?
Here is my Pinterest board with all of these and many ideas worth trying. Happy Valentine’s Day!


[…] Valentine’s Day Crafts for Kids […]